Advertise Here

Miss Adventures

-The Many Wonderful Adventures Of Jodi Ann!

Comments: (1)
Well ladies and gentlemen, I am officially an AUNT!! I can't even believe it myself.  My sister gave birth to a 7lb 14oz beautiful baby girl on Tuesday.  Just a few hours from my very own birthday!  I seriously couldn't have gotten a better present! 
 I can just stare at this perfect little face all day!
Speaking of presents, Make It and Love It is offering a fabulous give away here.  I have linked to her before, she a fabulously talented woman, and one of my frequent reads.  She is giving away this gorgeous pendant valued at $129.  It is the perfect gift for a new mom, don't you think?
So hurry on over to Make It and Love It's site to check out how to enter!  There is also a link in my sidebar if you happened to miss any of these ;)  GOOD LUCK!!!
<3 Jodi Ann!
Years ago my mother gave me this binder that she came across during an estate sale.  She brought it home for me, because then, I was an aspiring young artist and she thought I would enjoy it.  Enjoy it I have,  I have always looked at this binder, wondering about the owner and her story.  It has been a great source of inspiration.  I recently brought out the binder and decided to try to find out a little information behind it, sadly though, the internet searches and letters to McCall's have yielded no results.
I have taken many many pictures of the items within this binder for two reasons.  One, to share with you and two, to hopefully find out a little something about these pieces.  If you have any information regarding these schools I would love to know more!  I have removed the woman's name for the privacy of her and her family.  The dates that I have found range between 1931 and 1940.  Here is what I am talking about: (you may click on any image to get a larger view)
McDowell School Booklet and Application for Registration.


                               List of Courses: Tuition $250


 Sample Illustrations
 Another McDowell School Booklet
Letters From McDowell
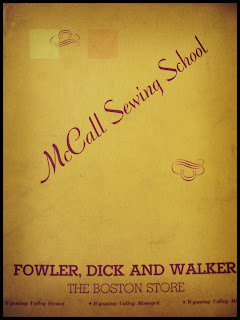
McCall Sewing School Folder
Samples of the "Mystery Woman's" Work
One of my favorites
The back of the Illustration Boards:
Fireside Studios, Dated 1931
Quote: "There are many different ways a married woman can write her name."  
Resort Fashions :)
Isn't it amazing?  I always wondered what happened with this woman.  She was a woman in the 1930s who wanted to go to school in New York City.  She took design courses from home, as far as I can tell by the boards, some of them were stamped upon receiving.  If anyone has any information about these pieces please let me know.  Until then, I will enjoy them in wonder as I've done before :)
Stay happy, healthy and safe.
<3 Jodi Ann!


Comments: (0)
Earlier today I told you that I was working on a little something.  Well I am finished and I'm very pleased with the results.
I had never worked with Mod Pogde before.  I know it's like a crafter's sin, but seriously I hadn't.  I bought a little jar yesterday thinking, I'm gonna see what all the fuss is about.  Well this stuff is awesome!  But you probably already knew that :)  I think it takes a lot of self control, however, because I could see myself mod podgeing everything in the house!  Don't worry the cats are safe.... at least for tonight ;)  Seriously though, I started looking up some mod podgey projects and there are some great things out there.  Like these shoes for instance. Shoes, yes mod podged SHOES
Well I am not nearly skilled enough to make shoes, so I chose to pretty up a wooden tray that I had in the house.  I've been seeing a lot of sweet little birds lately and I wanted some of my own.
Here are a list of supplies:
  • Wooden Tray
  • Jar of Mod Podge
  • Scissors and/or X-acto knife
  • Foam paint brush
  • Scrapbook paper
  • Pencil
  • Paint
  • Paint brushes
First, paint your tray, let dry.   Next, draw out a plan, something rough to give you an idea of what you want to create.  Next draw out your pieces on the back of the scrapbook paper.  Keep in mind that when you draw the image on the back it is going to be backward when you flip it over so draw it backward to compensate for this.
When you have your images drawn out, cut them out carefully.  After this, lay all of your pieces out making sure you like the configuration.  This was the hardest step for me, I tried many different things before I settled on the final design.  Although it is quite fun putting your pieces together and seeing all of the different options you have.  It is a puzzle of sorts.
After you find the winning combination it is time to begin.  Using the foam brush, brush a thin layer of mod podge on the tray (or whichever surface you choose) and also on the back of the paper and paste and place all of your pieces.  After your pieces are glued down put a coat of the mod podge over the entire thing, careful not to lift the edges of the paper.  Now if you have never used this medium, as I hadn't, I will tell you expect to see a white film covering your beautiful paper.  This is okay!  It dries so clear... WHEW!  I wish someone had told me that.  I questioned this the whole process, wondering if I'd ruined it! 
Let the whole thing dry and then continue to add layers of the medium until you reach your desired result.
Lastly, place it on your new cube shelves and gaze lovingly somewhere you will be able to enjoy it :)
I'm off to eat a late dinner :) Have a wonderful night.
<3 Jodi Ann!
OH YAYAYAYA I got my cube shelves yesterday!  I am so excited.  I went right after class, bought it, came home and put it together twice one time... perfectly... no problems.  And got to the fun part.  I had plenty of room for all of my things, I have two totes for fabric, one for odds and ends items like rulers, glue gun, ribbon etc and one for school supplies.  The best thing is if I need something I can take the tote with me and it stays organized.  I feel peace entering the space for the first time in a year :)
Well enough about it.. check it out for yourself, let me know what you think.
I also bought some Mod Podge.  I am currently working on a little something, so I will see you soon :)
Until then, stay happy, healthy and safe.
<3 Jodi Ann!
Comments: (0)
A mess.
Oh yeah, and a little gift cube.  What is a gift cube you ask?  Well it's a soft little cube with a smile, and a gift card!  I saw something similar somewhere on the web, but sadly I don't remember where.  I will try to post a link when I find it.  I like the idea of giving a gift card with a personal little touch.  So instead of just making the little pocket I decided to add a little cutie face :)
Oh yeah, and some little arms to help hold the card.  And a sweet little bow, just to add some pretties.
I do have a confession, I do not like felt.  I know it's wrong, but in my defense I don't believe it likes me very much either.  Felt seems to become misshapen very easily, and it dulls my scissors to no end.  I think I am going to be sticking to fabric after this. 
Tomorrow, I am taking a trip to get my cube shelving, ahh the thought of adding organization and space to my little craft area makes my heart very happy!  I will try and post pics when it is finished. 
Until then stay happy, healthy and safe,
<3 Jodi Ann!
Comments: (0)
Today I bought a bunch of felt, I don't really know why.  I had no real intention when I bought it, but it was too pretty to resist.  So I came home and thought about it, picked up a tablet and began doodling.  Then I came up with this guy/girl.

I have to admit, I have been seeing owls everywhere and I love it!  I love it so much that it was pretty much the only thing I doodled.  I got right to it.  It is a pretty basic process, cut and paste (or in this case stitch).
 
  Flip him right side out.
YEEEEEEOOOOOOWWWWLLL!!
Add some stuffin' and voila!  You have yourself a cutie! 
I'm a sucker for that sideways smile.  Mr. Owl now resides next to my craft area, he is there to be supportive and possibly judge every stitch I take.... hmmm.
Well that is all for tonight, but stay tuned.. I have some good ideas cooking :)
.... as will I.  
Stay happy, healthy and safe!
<3 Jodi Ann!

Comments: (0)


<3 Jodi Ann!